10 Expressive Art Therapy Activities to Try Now

Article / 02 March 2024

Expressive art therapy activities are a great outlet for self-expression, self discovery, and for understanding your thoughts and feelings in a productive and creative way. They can help promote psychological growth, mental well being, and even inner healing. In addition, they can help you articulate your inner thoughts and worlds easier when words may not be enough. Here are 10 easy and relaxing expressive art therapy activities to get your creativity flowing that you can start with right now!


10 Easy Expressive Art Therapy Activities

1. Draw Your Feelings

Are your emotions calm, happy, anxious, upset, or something else? Draw how you’re feeling in the moment. Your art can be abstract or something a bit more recognizable. You can use colors that best represent your emotions and if you’re stuck on what to make, you can always sketch something that represents those feelings for you. Whatever is easiest for you.


Drawing helps calm me down and feel more relaxed, so I drew different types of waves below. The top is a sun against the sea while the bottom 2 images are my interpretation of waves.

Try your best to draw that out on paper. It’s a great exercise to understand your feelings.

2. Draw What Makes You Feel Happy

On of the many expressive art therapy activities out there, is to think of a fond memory of a place, person, or thing you enjoy. You can express your personality through drawing things with joyful connotations because it helps you dive deeper into a positive space while helping you recognize what brings you personal delight and contentment.


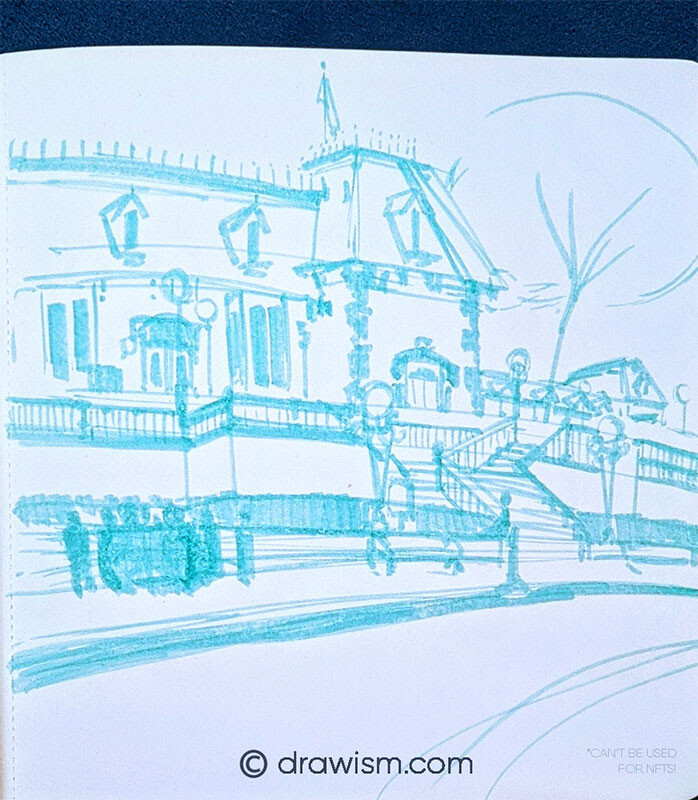
The image above is a sketch of the trolley station at Disneyland.

For more feel-good art therapy prompts, check out these 10 Positive Art Inspiration Ideas for Drawing!

3. Use Your Favorite Colors

A great way to express yourself through art is by simply using your favorite color(s) to draw. Drawing with your favorite color really shows off your personality and an aspect that makes you unique.

Blue is my favorite color, so I combined that with one of my favorite subjects to draw a rough city-scape.


Try not to focus on making a perfect artwork but instead on the process and how it makes you feel. Make your art as rough or complete as you’d like!

Try combining your favorite color with a subject that makes you feel happy.

4. Nature Drawing

Drawing nature is not only relaxing but gives us a feeling of freedom and tranquility. Also, sketching nature and foliage is very gestural, allowing you to put more fluidity and movement into your art, helping you to further express yourself with physical movements.

What in nature appeals to you? Is it the puffy clouds you see in the sky, the cool grass against your feet, or the flowers and trees you see on your way to your next stop?


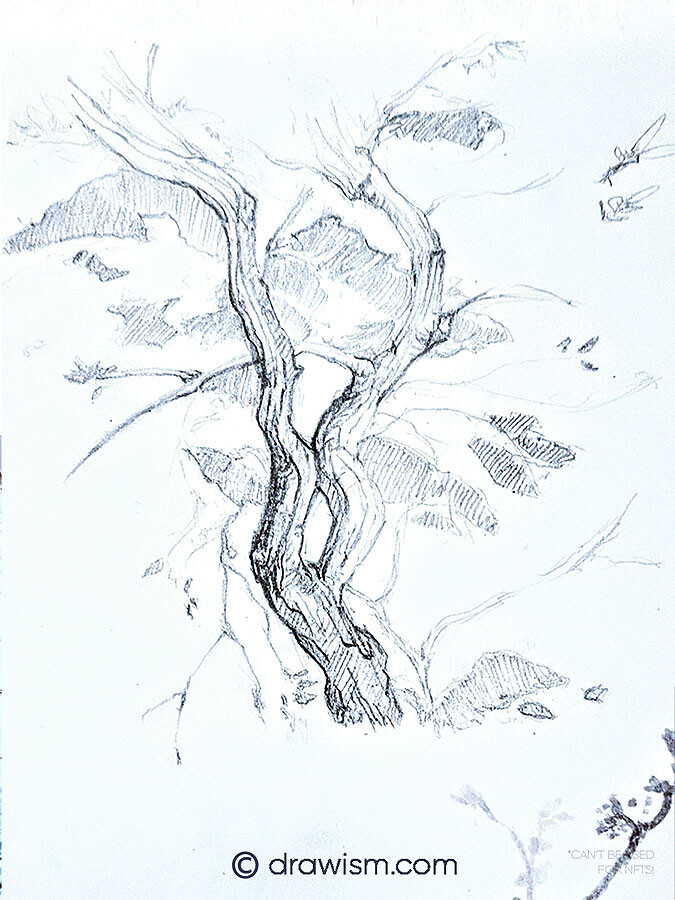
Whatever speaks to you and your emotions, draw it!

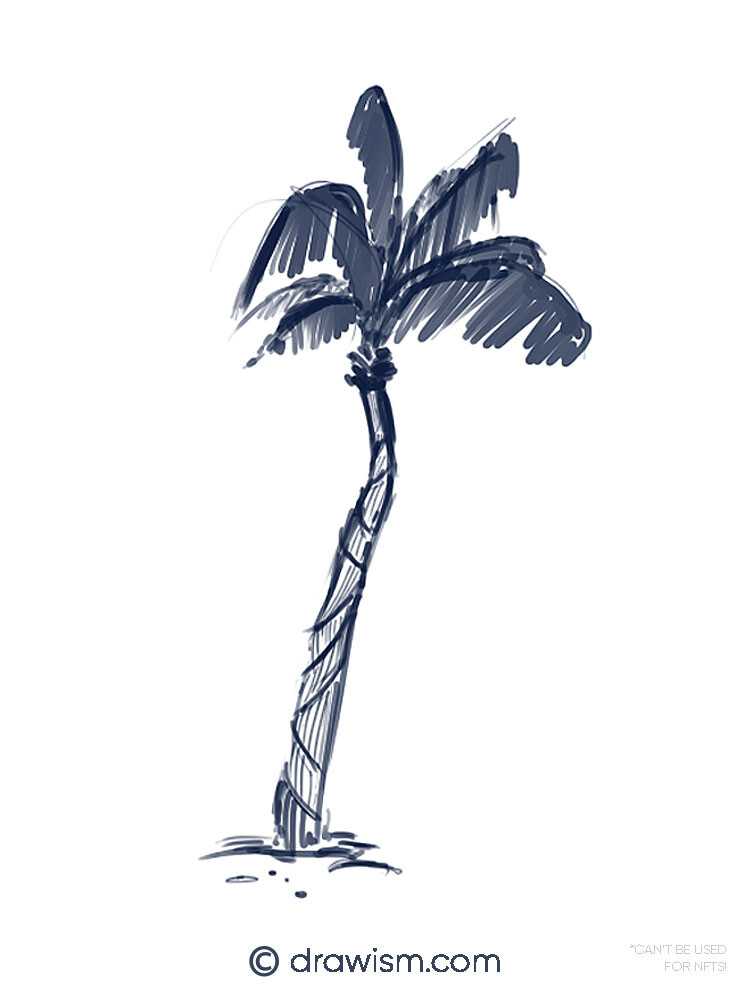
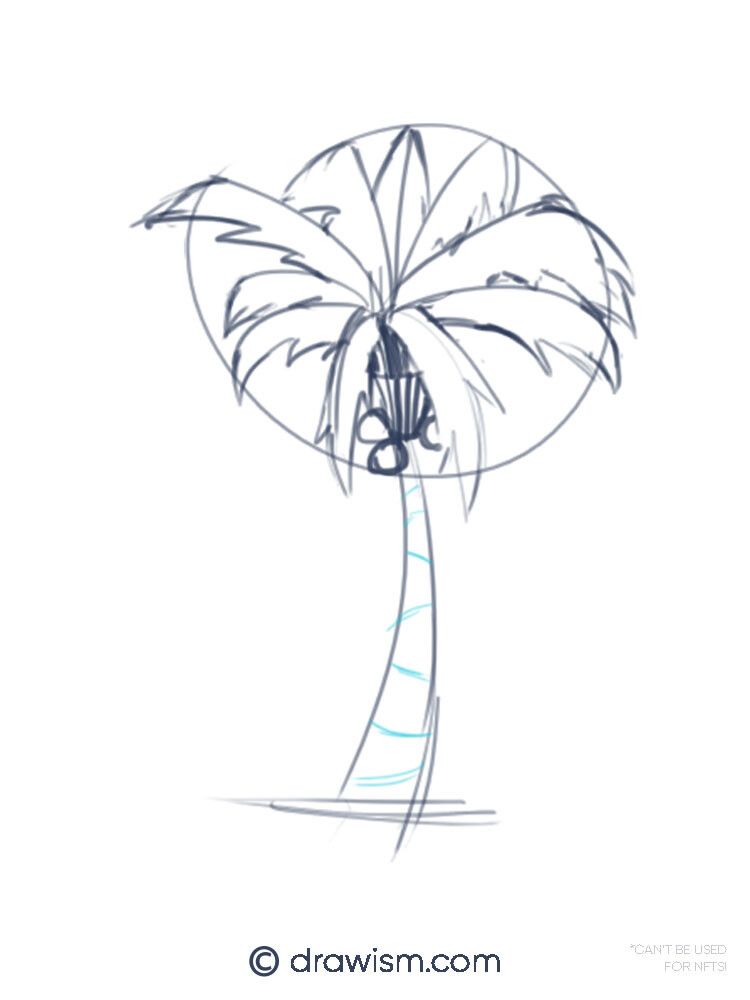
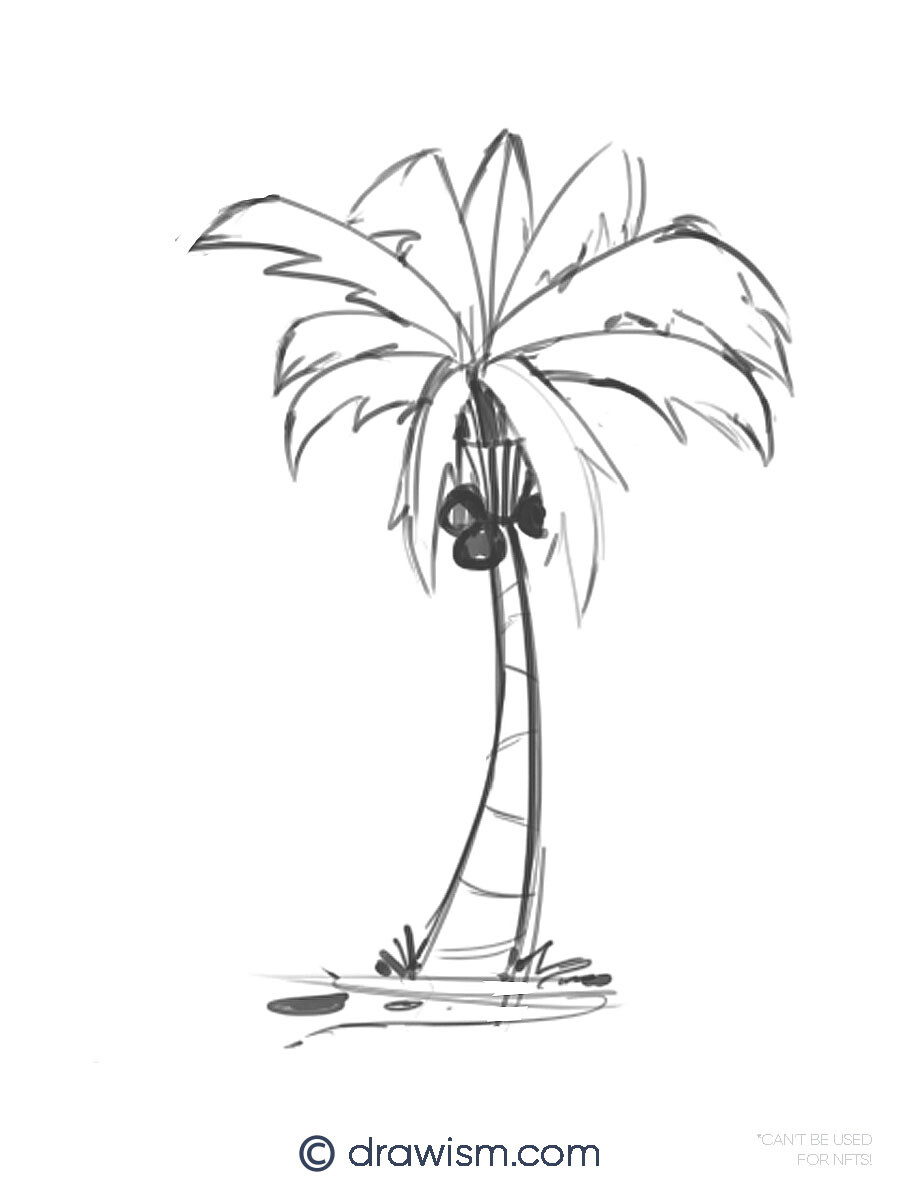
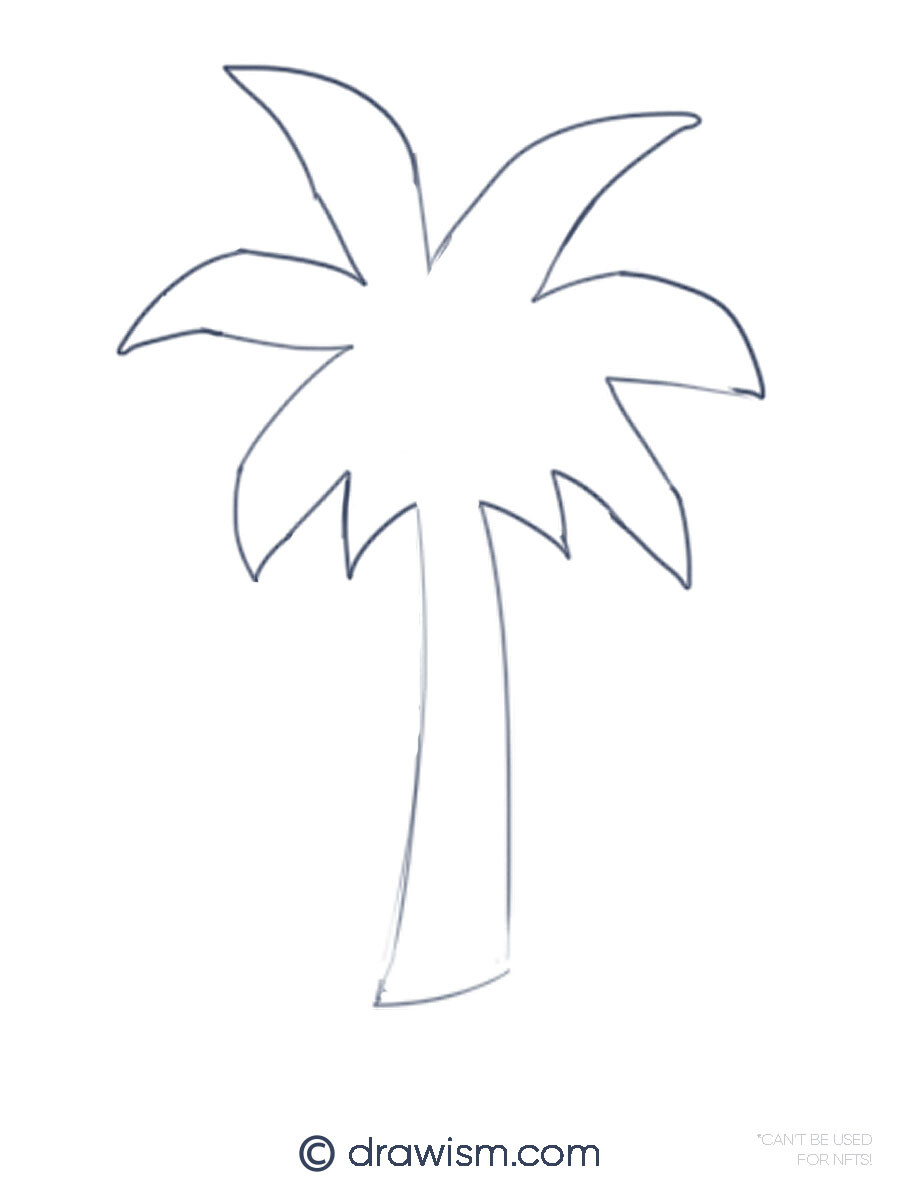
If you’d like more relaxing drawing ideas of nature or how to draw nature art, check out How to Draw Easy Pen Flower Doodles for Beginners, How to Draw a Tree Branch Freehand, or How to Make Palm Tree Drawings for Beginners.

5. Draw Your Favorite Animal

Animals are just so cute and awesome.

What’s your favorite animal? Or is there an animal that you feel best represents your personality? Like in #3, try sketching it in your favorite color. And no pressure on getting it to look right!

It can really help you get a better sense of your personality based on the types of animals you like while calming you, as animals normally bring joy.

6. Illustrated Text

Drawing text and words is a great expressive art therapy activity that’s simple, fun, and the possibilities are endless!

It helps in not only drawing out your feelings in recognizable words but puts a physicality to them that you can actually see, helping you to express your feelings and understand your thoughts.


Try drawing words in different styles, colors, or even with some small doodles. Make it your own!

7. Draw Movement

Movement in itself is beautiful. You can draw something that looks like it’s moving, while still being abstract or vague.

Drawing the idea of movement not only captures your physical hand movements on a page but brings you’re drawings to life. It helps express the way in which you make art and can even capture your emotions, allowing you to be self expressive while relaxing your mind, as this is a mindfulness exercise with no definitive stopping point.

To illustrate movement, try sticking with large strokes using your entire arm, not just your wrist. Focus on making curved and flowy lines instead of straight and scratchy ones. And try to fill up the entire page, not just one small section! This will enhance your art making it look more fluid and gestural.

For more easy and relaxing gestural drawing ideas, check out these 5 Insanely Easy & Calming Drawing Ideas of People for Beginners & Non-Artists.

8. Free Drawing

One of my favorite expressive art therapy activities is to ‘free draw’. Free drawing is when you allow your hand to guide you while creating art without actively thinking or preparing to draw anything it particular.

It’s a calming mindfulness exercise that brings you into the present while focusing on ‘going with the flow’. It doesn’t have a particular focus but has room for a lot of happy accidents.


Here are some more free drawing art therapy activities for stress management and art therapy activities for aggression.

9. Make a Self Portrait

If you have a hard time trying to think of how to express yourself in art, a great idea is to draw yourself. What better way to express and show yourself in a way that best represents you, with an artwork of you?

It can be as detailed or simple as you like and doesn’t even have to be of you-maybe things you like?

You can make your self-portrait more personalized by using your favorite materials or colors.

Check out this article of the many different types of self-portraits you can create, if you don’t know where to start.

10. Sketch Your Personality

Now, I want you to think about your personality for this next expressive art therapy activity. What type of person are you? What makes you unique? Are you funny, an extrovert, or more of an introvert?

Now, try drawing that personality on paper.

If you’re having a difficult time trying to sketch that, try looking at shapes and patterns. What pattern best represents you?


I chose a 90s pattern with bright colors because I can be spontaneous but also all over the place sometimes. My thoughts can get pretty cluttered but I love colorful things and different types of random shapes.

Try finding a pattern that you feel best shows off your personality and draw it!

More Expressive Art Therapy Activities & Drawing Ideas:

Feel free to share these expressive art therapy activities on social media or try to come up with your own! See you in the next post.

The article 10 Expressive Art Therapy Activities to Try Now was originally published on Drawism.com first.

Report

Surprising Differences You Didn’t Know Between Traditional Art Expression & Expressive Art Therapy Activities

Article / 25 February 2024

What is the difference between traditional art expression and expressive art therapy activities? They sound pretty similar so they should be the same type of art creation, right? Not quite. Each of these activities have different reasons and methods to achieve their desired purpose. Let's find out what the difference between traditional art expression and art therapy activities are so you can decide which of these artistic endeavors best suits your creative needs!


Contents

  1. The Difference Between Traditional Art Expression and Expressive Art Therapy Activities
  2. What is Traditional Art Expression
  3. What is Expressive Art Therapy
  4. The Intent
    • Of Traditional Art Expression
    • Of Art Therapy Activities
  5. Types of Traditional Art Expression vs. Art Therapy Activities
  6. Why is Artistic Expression Important?

The Big Difference Between Traditional Art Expression And Expressive Art Therapy Activities

What is Traditional Art Expression?

Traditional art expression is the use of physical art processes and artistic mediums (such as paint, watercolors, drawing, collage, or even performance art, etc.) to express one's thoughts, emotions, viewpoint, or make an artistic statement resulting oftentimes in a final physical piece of art which may or may not be focused on a specific or unique art style.

What are Expressive Art Therapy Activities?

Expressive art therapy is the use of artistic mediums and the creative arts as a form of therapy to mentally heal and connect with one's own feelings that can be used as therapeutic relief, in ways such as relieving uncomfortable thoughts, mindfulness, and other calming activities. These activities are meant for personal reflection, growth, and emotional progress. They are not focused on a specific art style.

These activities include various types of art therapy prompts, sometimes guided art exercises, and tutorials with a focus on sustainable and healthy mindsets that are to directly help the individual that's doing them.

For a deeper look into art therapy activities or if you want to try some on your own check out these 10 Quick & Simple Art Therapy Activities for Beginners or you can try making an art journal with Easy Art Journal Therapy for Beginners.If you're looking to manage stress, here are some easy Art Therapy Activities for Stress Management.

The Intent of Your Art

The idea that art is an expression of the mind, is present in both of these creative activities but the intent of the art is a big difference between traditional art expression and expressive art therapy activities.

Traditional Art Expression

A main purpose of traditional art expression is to use art as self expression to help put an artist's feelings, emotions, or thoughts into a physical manifestation either for the artist's personal/ private objectives or to present it as a finished piece of artwork, for such events like gallery shows, art auctions, or art exhibits.

Artworks created as traditional art expression oftentimes have an intent of being presented to other people in a public setting where the artist isn't the only audience of the work.

There are even times when you're art doesn't have or need to have a purpose. That's 100% okay!

Do you have an idea, emotion, or thought that you'd like to express through art? This question can help you decide if traditional art expression is right for your project.

Expressive Art Therapy Activities


Expressive art therapy activities on the other hand are created mainly for the artist/creator themselves as ways to reflect and understand their emotions better.

There usually is no clear intent for art therapy artwork to be shown in public spaces as it's mostly a very personal type of expression and self-improvement. But of course, you can always sell your art therapy work if you'd like, as long as you feel comfortable sharing it!

If you'd like some examples of expressive art therapy, check out these 10 easy Expressive Art Therapy Activities to Try Now!

Types of Traditional Art Expression & Art Therapy Activities

To help you better understand the difference between traditional art expression and expressive art therapy activities, here's a brief list of examples for each.

Artistic Expression Examples

1. Abstract Art

A common form of traditional art expression is abstract art.

Abstract art doesn't have to look like anything in particular. It can be a bunch of markings on a piece of paper like shown below. Through movement, colors, and materials, you can express yourself in many ways.


For a more detailed understanding, check out this in-depth article on abstract art by Yuri Shwedoff.

2. Comment on Society or Culture

Another form of using art as self expression is though social or political commentary. You can illustrate your viewpoint on a topic through art.

The image below is my depiction of an NFT and how I viewed NFTs as being a valuable object of fine art or a collectible for some people, so much so that some people are willing to steal the art of artists' to make that happen.


Here is an explanation of art as social commentary by Rina Factor and 49 examples of art being used to comment on society by Bored Panda.

3. Self Portrait

Portraits or self portraits are a very common form of traditional art expression.

They can express how an artist views themselves or other people while giving a little bit of insight into the artist's personality, based on the techniques and styles used.

A self portrait can be anything, not just your face. It can be an abstract drawing or even a set of objects that best represent who you are.

Here are some examples of the many different self-portrait types from famous artists.

4. Personal Art Style 

Making art in a style that you like is self expression because you are depicting something that resonates with you, in an art style or form that you feel best represents who you are and your artistic skills.

Having a personal art style is another (slight) difference between traditional art expression and expressive art therapy activities because art expression is focused more on the individual's interpretation of an idea and is subjective whereas art therapy activities are more straightforward and objective.

Below is an example of a watercolor drawing depicting a cute sushi roll with some other foods I enjoy. I painted this piece because I love Japanese food and cute things. But I chose watercolors because I love that washy yet illustrative look.


5. Art Self-Expression Drawing

An art self-expression drawing is a great way to draw your thoughts and feelings about anything. It can be about how you're feeling in the moment, how you feel about a certain topic, or even a concept or idea that resonates with you.

Here are some examples of self-expression art drawing with artist interviews for a little art inspiration.

Art Therapy Activities

1. Mindfulness Drawing

A common art therapy activity is mindfulness drawing. What this does,  is help the individual by bringing their mind into the present, away from racing or negative thoughts.

This technique is very effective in teaching someone mindfulness because it helps them focus on the present, the here and now, instead of past or future thoughts.

Mindfulness drawing can be anything from quick and easy drawing exercises, such as drawing circles or lines, to sketching simple shapes or patterns.

2. Doodling

Doodling is a form of art self-expression drawing that is also a fun art therapy activity. The focus of doodling is to make small and quick drawings. What's great about these doodles is that you can draw them in your notebook, planner, or art journal to add a bit of joy to your pages.

Try doodling things you enjoy. This will help boost your mood by connecting your art with positive and happy emotions.

For more fun quick doodles, check out these 15 Relaxing Doodles to Draw When You're Bored!

3. Art Therapy Prompts

There are many different types of art therapy prompts to get you started, with specific ones targeting certain emotions or feelings, like anxiety or racing thoughts. These can really help in connecting with your emotions and understanding them better.


Try these 10 Art Therapy Prompts for Racing Thoughts if you want to try some art therapy activities.

4. Coloring

If you feel like it, just color!

You don't need to draw anything in particular. Coloring by itself is great for relieving stress and as a simple and relaxing art therapy activity. It keeps you in the present and focused, while not putting any pressure on yourself to make a perfect drawing. Easy peasy!


Why is Artistic Expression Important?

Art is an expression of the mind, something that's not a difference between traditional art expression and expressive art therapy activities.

Artistic expression is important because it serves as an outlet for us to visually communicate our thoughts and emotions in a productive and clear way that can't be expressed solely through non-visual information, such as sounds, words, or conversation. Artistic expression in the form of a painting, self-expression drawing, or even sculpture can evoke specific feelings that may not be possible with other stimuli.


More Expressive Art Therapy & Traditional Art Expression Activities:

Art Therapy Activities

Traditional Art Expression & Drawing Ideas

Now that you know what the main difference between traditional art expression and expressive art therapy activities is, you can decide which one to use depending on your creative needs or just use art as self expression!

Let me know your thoughts in the comments below and see you in the next post.

The article Surprising Differences You Didn’t Know Between Traditional Art Expression & Expressive Art Therapy Activities was originally published on Drawism.com first.

Report

7 Easy Ways to Halt Depression & Anxiety When Using Social Media For Art

Article / 17 February 2024

Drawing can quickly become overwhelming for many reasons, most of which we're usually not prepared for, such as anxiety, depression, creative burnout, perfectionism, or unrealistic art expectations. These not only take a toll on your art, but most importantly, you. It can affect your life in a variety of negative ways and have negative effects on social media artists. But it doesn't have to. Here are 5 tricks for social media artists to stop depression and anxiety when online and how to keep posting art like a pro!


*Disclaimer: I'm not a medical health care professional. These tips are something that has worked for me and may not work for everyone. If you've been diagnosed with anxiety or depression or feel it's so overwhelming and/or gets in the way of your daily life, please seek a medical health care professional and /or a licensed therapist.

Social Media Artist: 7 Easy Ways to Stop Depression & Anxiety When You're Online

1.  Don't Rely on External Sources for Your Confidence & Validation in Both Your Art & Personal Life

My absolute #1 rule as a social media artist, is : Be confident in yourself and don't rely on social media for validation or approval! Social media is not going to give that to you, and certainly not overnight. Social media is a tool, and that's it. It's a means to help you achieve some artistic goals you may have but only if, you learn to play it's game, and play it well (which can take months if not years, to get good at.)

Having hobbies you enjoy, a social circle, and /or people that support you will help you build confidence in those areas of your life where you're not reliant on social media to give you validation or approval. Not only does this build your mental state up very positively, it also prevents anxiety and depression from seeping into those mental cracks.

  • Social media can make you feel more depressed, unqualified, or not as good as other artists you see online, setting you up for a 'comparison' mind set, where you feel you're always in a competition with other artists

SOLUTION: The key here is to find a balance where you have enough confidence in your content and skills but low expectations from outside sources that don't come from you. So, know that using social media for art can be extremely beneficial for your goals but it isn't 100% necessary for you in reaching them. You don't need social media as an artist.

2.  Treat Being a Social Media Artist as a Job

In order to promote this blog's content, I do need to use social media like Pinterest, so my articles get seen by more people. If I don't, then my blog won't grow. Personally, I'm not a huge fan of using it but I can say it definitely helps in promoting my content and finding new readers like yourself. 

Depending on your art goals, social media can be a necessary evil for some of us artists. So, it's important to set boundaries with it and know your own limitations. 

  • Know when you're mentally prepared to log in, how long you should stay, and when to log out
  • Think of 'social media artist' as a job title
  • Set a timer for how long you want to spend on social media, and clock out when time's up
  • Have a clear goal of what you want to accomplish with your social media account in each session, before you log in
    • This makes sure you don't overstay your welcome, especially mentally and makes your interactions short and sweet.

I use Art Station as a portfolio website for my art. But seeing everyone else's incredible work on a daily basis can be very defeating, making me compare my work to theirs. When I start getting in my own head and questioning my artistic skills, that's when I know it's time for me to take a break and log out for a few days or weeks. If you feel similar, then that's your mind telling you it's time to log out of your accounts.


3.  Do Your Best to Not Bring Your Emotions Into It

A huge reason why social media artists can feel stressed, anxious, or depressed, is that we tie our emotions to it. When this happens, we become reliant on it as a source of validation, happiness, and other positive feelings. Not to mention that dopamine rush we get whenever we get likes, comments, or follows on our art.

It feels good, if not amazing to get seen for our art.

But beware, it's also a trap! Using social media as an artist can become an addiction to satisfy those mental cravings and feelings if you're not careful, pulling you further into those negative emotions. Especially when you don't get the engagement you're expecting. 

SOLUTION: Leave your emotions at the door or in this case, at the login window. Understand that being a social media artist is either a hobby or profession, it's not your entire identity! Try not to get too attached or caught up with the attention you may or didn't receive on social media platforms. Engagement is a poor indicator on whether an artwork or post is good or not.

  • This helps separate your online activity from your personal life, exactly like how you'd leave your personal life out of your job
  • Approaching your social accounts as a tool and not an extension of your personality helps compartmentalize your social media life vs. your personal life and helps you see your goals clearer while not involving any personal feelings

4.  Have a Back Up System  or Ritual To Do When You Notice You're Feeling Down from low engagement or negative responses

There are many times where I've felt let down by social media as an artist. And when I did, I felt worse about myself. I would be mentally abusive to myself or ask myself why I'm such a failure, 'I suck', or 'I'm not good enough, no one will ever like or notice my art'. 

But the truth is, those are just my fears and thoughts talking, not reality. Just one of the many negatives of social media art engagement.

To get myself out of these stressful feelings, I have a system of actions I take that help me positively cope with negative emotions from using social media.

When you have a backup system or ritual at-hand when you notice you're feeling down from social media, you are better prepared to cope with those anxious and depressing feelings and bypass the unimportant things.

  • It helps you cope with your feelings and emotions positively and gets you in a better mood, fast
  • Makes getting on social media more manageable
  • Will really help in preventing and blocking anxiety and depression
  • Helps you stick to using social media for the long-term if that's part of your art plan

SOCIAL MEDIA ARTIST DETOX SUGGESTIONS:

Here are just a few suggestions of what you can do to improve your mental state when being a social media artist feels overwhelming.

  1. Log out for as long as you need - it can be days, months, weeks, or even years
  2. Stay Away from Your Feed and 'Explore' Sections
  3. Find Out What's Causing You're Disappointment, Anxiety, or Sadness
  4. Find Other Hobbies That Make You Feel Good in Your Free Time, Instead of Scrolling Online : I like to play video games because it calms my thoughts
  5. Have a Social Circle or Someone to Talk To to Vent Your Frustrations

5.  Social Media Artists : Be Prepared to Be Disappointed

I recently posted a character design that I spent weeks learning some cool new skills on, to my social media thinking I was going to get a ton of likes. Yeah. F'-n. Right. I only got 2 likes (which I'm grateful for).

I can't tell you how many times social media has let me down. And it's not because of my work. Mainly due to algorithms and how often you post new content. 

But it's this type of mentality and expectation that can really lead to depression and anxiety when you're a social media artist because it's a feeling of being let down after you had high hopes of success. And it doesn't feel good.

When we feel a high high, we're bound to feel a pretty low low.

So, we need to cope with this disappointment. This may be tough to hear, but both the good and bad outcomes are a possibility but the unfavorable outcomes are much more likely to happen, like not getting likes, followers, or even any type of engagement.

  • Know that your content may not be popular or shown to  a lot of people, when first creating an account
  • It's okay to not get a lot of likes or comments on your posts - it's 100% normal and expected
  • It's more than okay to not be popular on social media as an artist, it doesn't always mean your art work is bad, it's just not shown to a lot of people, maybe even no one
  • The people you see on the front page or 'the popular' accounts are most likely in the top 1-3% of all accounts on the platform - That's an incredibly low percentage and even harder for a new account to reach!
  • Being on the many social platforms feels more like a competition between social media artists over who gets noticed more
    • Instead, take yourself out of the competition and focus on content that you want to make

For a more in-depth look at using social media for art, its many drawbacks & benefits, check out this article Being a Social Media Artist is a Competition.

SOLUTION: Be confident with your art posts and content but have very low expectations of the engagement you may receive. When you're mentally prepared for the worst outcomes, you've lowered your expectations with social media and will less likely to be disappointed on the many platforms out there, helping you to further prevent anxiety, depression, and other stressful feelings when you're online.

6.  Be Aware & Notice When You're Feeling Down

As a semi - social media artist, I can't tell you how important this next tip is.

When you are aware of and notice when social media is making you feel not good enough as an artist, when you're feeling stressed, burnt out, anxious, or lost on these platforms, these are the moments when you can stop anxiety and depression from affecting you. 

Noticing when and why these exact moments of feeling down happen not only help you understand your emotions and reactions better but greatly help you in preventing them once you understand the cause.

How to Notice Negative Mental Feelings When You're a Social Media Artist

  1. Write down a short list or notes describing how you're feeling when certain things happen on social media
    • ie: How do you feel when you don't get enough likes, comments, or followers?
    • How do you feel when you lose followers - how does that affect you?
    • What makes you feel happy on social media -for example is it more followers or more engagement of your art?
  2. Describe how certain results and actions make you feel
  3. Pin point the actions and outcomes on social media that make you feel negatively about yourself
  4. Once you know the cause of stress, anxiety, or depression, you can find solutions that will help in blocking these feelings

7.  Set Blocks of Time To Be On Social Media

As simple as this sounds, setting a specific amount of time on social media as an artist is an invaluable tactic to stopping anxiety, depression, and all those other nasty feelings. When you have a set amount of time devoted to social media, not only will you accomplish your tasks faster but you'll save your time for other important things instead of draining time on scrolling through other artists' content.

Why is this a big deal? Well, the time you're not scrolling is the time when you're not comparing yourself to other artists on the platform, a huge reason why anxiety and depression can start from social media - comparing what you have with someone else. When you feel you don't have what someone else has or you want what someone else has, that's when depression, anxiety, and jealousy start, to name a few.

SOLUTION: Set a specific but short amount of time to be on social media, whether it's 5, 10, or 30 min, or whatever works for you. Focus on doing only what you need to, like posting new art or checking stats. Limit or don't use the explore and feed sections. When you eliminate how other people's content makes it's way to you, whether it's looking through your feed or at notifications of someone else's artwork, you eliminate the chance of comparing yourself to another artist, ultimately helping stop depression and anxiety from affecting you.

More Related Posts:

Check out some of these helpful resources for more awesome social media artist tips, tutorials, and more:

Would you like to see more topics on using social media for art and artists?

Let me know your thoughts and what you thought of this article in the comments below. See you in the next post!

The article Social Media Artist: 7 Ways to Stop Depression & Anxiety When You’re Online was originally published on Drawism.com first.

Report

3 Quick & Easy Palm Tree Drawing Tutorials for Beginners

Tutorial / 10 February 2024

Looking to add some tropical flair to your art or just want to learn how to draw a palm tree? You’re in the right place! This article will show you the top 3 palm tree drawing tutorials with no art experience needed! You’ll learn how to draw a detailed / realistic palm tree, as well as a cartoon version plus a palm tree outline, with sketch tips and tricks to help you along the way. Let’s get started!


Contents

  1. How to Start Drawing a Detailed Palm Tree with Leaves (Realistic)
  2. How to Draw a Cartoon Palm Tree
  3. How to Start Drawing a Palm Tree Outline in 3 Steps

How to Make a Detailed Palm Tree Drawing with No Art Experience

1. Learn to Sketch a Detailed Palm Tree Drawing with Leaves, Realistic Style

1. Draw the Trunk

Let’s first start drawing the trunk. Sketch a slightly curved and angled line. This is essential for getting a detailed or realistic palm tree drawing because palm trees normally don’t have perfectly straight trunks, they look like they slightly sway to one side.


2. Draw the Rest of the Palm Tree’s Trunk

Try your best to draw the same shape of the trunk like you did in step 1, for the trunk’s right side and make sure to taper it, making the trunk wider at the bottom. This makes your palm tree sketch more believable and realistic.


3. Draw the Sand

Draw a few curved lines of sand at the bottom of the tree, for more detail and realism. This makes your sketch look more realistic and detailed.

Add a couple spots to the sand to really make it stand out.


4. Draw in Trunk Details

Let’s add some details to the palm tree’s trunk. Sketch in slightly curved lines within the trunk, leaving some space between each section. These lines section off the trunk, making it more realistic.


5. Draw the Husk

Draw the husk at the top of the trunk with a few simple dabs or lines. A palm tree’s husk is where the coconuts and leaves sprout from, so having this unique detail in your drawing makes it feel more realistic.


6. Sketch Where the Palm Tree’s Leaves will be

Before we start drawing the leaves, here’s a fun fact: palm trees don’t have branches. Their leaves actually grow on top of the trunk!

If you’d like to learn how to a draw a tree branch, check out this easy drawing tutorial for beginners showing How To Start Drawing a Simple Tree Branch Freehand!

Next, let’s start drawing the leaves!

When making a palm tree drawing with leaves, it’s easy to be overwhelmed with all the details. So lets’ simplify it by just sketching lines for where we want our leaves to be. This will make drawing the leaves 1,000 times easier!


7. Scribble in the Leaves

Now for the fun part! Instead of drawing the leaves one-by-one (which will take so much time and look uneven) just scribble them into the sketch lines you drew in the previous step! Not only will you get a lot of detail but your palm tree drawing will look realistic pretty fast! It’s that simple.


8. Finished Detailed Palm Tree Drawing with Leaves

Congrats, you’ve finished drawing a realistic and detailed palm tree drawing!

To add even more detail and realism, you can shade in the trunk by drawing in quick, short lines in each section of the trunk and that’s it!

Amaze your social circle with this awesome drawing or post it to social media and show it off.


2. Draw a Cartoon Palm Tree


1. Start with Drawing the Tree’s Leaves

Let’s start drawing a cartoon palm tree by first making a circle. This will be the base sketch for the palm tree’s leaves and is essential for making them uniform and correct.


2. Sketch the Trunk

Starting close to the bottom of our leaf circle, draw 2 curved vertical lines for the palm tree’s trunk. Make sure they taper from top to bottom to give your drawing more volume. The more curved and tapered you make the trunk, the more cartoony your palm tree will look!


3. Sketch in Curved Lines for the Leaves

Draw curved lines from the center of the circle to the rim, making sure they’re coming from all directions. These lines will make it a lot easier for us to draw in the palm tree’s leaves.


4. Draw the Leaves’ Fronds

Using each line you drew for the leaves in the last step, draw in the rest of the leaves with curved and sharp fronds. This makes our palm tree drawing look a bit more cartoony.


5. Draw the Palm Tree’s Husk

Where the leaves and trunk meet, draw in the husk. You can think of this shape as a pair of bikini bottoms to make it easier to draw!


6. Let’s Draw the Coconuts!

Around the husk, just draw 2–3 circles for the coconuts to make it look more like a cartoon palm tree!


7. Add Details to the Palm Tree’s Husk

Draw in some detail to the husk to add more dimension. Just draw lines inside the husk’s outline, nothing fancy!


8. Draw the Trunk’s Details

Let’s add some details and dimension to the palm tree’s trunk by sketching in curved lines. You can make them straight or in a slope to make your palm tree drawing fit the cartoon style better.


9. Let’s Add the Sand

To finish your sketch, add some cartoon sand and plants!


10. Fill In the Coconuts and Make a Darker Trunk

To finish off your cartoon palm tree drawing, you can color or shade in the coconuts and make the trunk thicker, by drawing over it once or twice.


11. Finished Cartoon Palm Tree Drawing

Congrats, you’ve finished drawing a cartoon palm tree! Give yourself a pat on the back and feel free to add this to your sketchbook, journal, or anything else that needs a bit of tropical cartoon flair!


3. Drawing a Palm Tree Outline

Unlike the previous palm tree sketches, this quick tutorial will focus on only drawing a palm tree outline instead of all the little details inside the doodle.

This type of drawing is fantastic because it’s both quick and very simple to sketch. Plus, you can add your own details and designs inside the line work if you like.


1. Draw the Trunk Outline

This step is quite simple — draw a slightly curved and tapered rectangle, without the top line. You can also curve the bottom line of the trunk a bit to make it look more rounder and voluminous.


2. Draw the Leaves

Instead of drawing each individual leaf (which can take more time and can come out quite uneven), let’s sketch the palm tree’s leaves in reverse!

Have a general idea of where the center of the tree’s leaves are. You can even make a little mark in the center of where you want to draw your leaves, to help guide you in drawing their outline.

Once you’re ready, just start drawing ‘V’s’ in different sizes, around the palm tree’s trunk. Nothing fancy!


3. Draw in the Ends of the Leaves

Looking good so far! To finish drawing your palm tree outline, let’s draw in the ends of the leaves.

All you need to do is sketch in the curved points of each leaf. Try to connect the ends of the lines as best you can to the rest of your palm tree drawing to complete your outline.


4. And You’re Palm Tree Outline is Finished!

Super easy, right?


If you’d like, you can clean up the outline of your palm tree by erasing out the sketch lines inside the drawing and anything else that looks out of place.


You can add this drawing to your sketchbook, notebook, or planner and add anything else that you’d like!

Palm trees come in all different shapes and sizes. You can use these drawing tutorials as a guide to sketch different types of palm trees, whether they’re short, tall, or somewhere in between. You can check out this awesome guide written by Georgette K. showing 43 different types of palm trees for a bit of drawing inspiration!

If you’d like to learn how to draw more nature, check out these other easy and fun drawing tutorials:

More Related Drawing Tutorials, Art Tips, & Cheats (Outbound Links)

For more quick and easy drawing tutorials with no art experience and how to get started drawing fast, check out some of these helpful articles below!

Which palm tree drawing do you want to try first? Leave a comment below!

The article 3 Best Palm Tree Drawing Styles with No Art Experience was originally published on Drawism.com first.

Report

How to Start Drawing a Tree Branch Freehand, Simple

Tutorial / 09 December 2023

Looking to start drawing a little bit of nature freehand and fast but don’t know where to start? You’re in the right place! This drawing tutorial will show you how to start drawing a tree branch freehand with a simple branch layout like the image below, plus sketch tips and tricks to help you along the way. Let’s get started!


How to Start Drawing a Tree Branch Freehand!

1. Gather Reference

Before I even get started drawing, I often use real life reference photos to correctly draw my subject. Whether it’s a person, object, or even my own character design, I always, always, always, use reference before doing any physical freehand drawing.

Why?

  • Remembering what something looks like slows down the sketching process and can take time
  • With reference photos, you’ll be able to capture details and forms well, while making your drawing actually look like your subject
  • Reference photos make the drawing process very simple and understandable while giving you a general layout of how to start your drawing

How to Get Reference Photos of a Tree Branch Before You Start Sketching

This part is very simple.

Open up your browser and just type / google in ‘tree branch’ into the search bar and press enter (search) or you can just take photos with your phone or camera and use those instead (what I usually do).


Whether you’re using Google or another web browser, there should be tabs around the search bar that say ‘images’.

Click on that and you’ll be shown so many images of tree branches you won’t even know what to do with!

All you need is 1-2 images. Too much reference photos can be overwhelming, especially when you first start drawing, so keep it at a minimum.

If the image allows, right click on the reference pic you like and choose ‘Save as Image’ to save it to your computer. You can print it out if you’d like, to always have your (tree) reference on hand.

2. Get Your Drawing Supplies Ready

You don’t need anything fancy for this tutorial.

Just a drawing surface, something to draw on, and something to draw with. You can use the classic paper or pencil or if you want to go digital, use a digital program.

To get a more in-depth idea of drawing supplies, check out this beginner-friendly article on How to Start Drawing with No Art Experience and what supplies you can start using right away.

3. How to Start Drawing a Tree Branch Layout with Simple Lines!

Using your reference photo of your branch, lightly start drawing straight lines that mimic the direction of the tree branches. This serves as a layout for your tree that you can then erase out or layer with details in your finished drawing.

Instead of thinking in 3 dimensional shapes, think in simple lines for now.

We’ll add some dimension to our tree branch later in this tutorial.

  • Remember: Keep it super simple – use only lines for this tree layout!
  • Focusing too much on detail now will slow you down and you might miss the opportunity to have a strong branch shape as a foundation for your drawing, possibly leading to your drawing not looking like a tree branch at all! Yikes!
  • Detail is secondary to your overall shape and form of your drawing

4. Think in Simple Forms – Only Cylinders for the Branches

Once you have your lines drawn, we can start thinking in 3d, yay!

So what is the general shape and layout of a tree branch? Figuring this bit out is important because it helps you visualize your subject in 3d, making it simpler for you to draw it. Well, since it wraps around, is a thin and circular tube, a tree branch’s primary shape is a cylinder, as well as the trunk.

  • Start drawing simple cylinder shapes freehand, using the the lines you just drew
  • Make sure the cylinders taper from thick to thin when making your way from the bottom, to the top of the entire tree branch
  • Remember: thicker cylinders at the bottom and thinner cylinders at the top

5. Refine/Darken Branch Linework Following The Cylindrical Forms

Once you’re happy with your sketch, it’s now time to solidify your lines, that is, make them slightly darker then the rest of the sketch.

  • Stick to drawing your lines thicker/darker focusing only on the outside lines of your tree branch
  • This gives your tree branch drawing more form and prominence

6. Add a Bit of Detail to Your Tree Branch

Now for the fancy part – drawing in the branch’s details!

You don’t have to go super crazy detailed at this stage but if you do , go for it! Just remember to use your reference photo so you know what the details look like and keep it simple.

For me, sometimes less detail is better since the tree branch drawing won’t be too busy but has enough information to tell what it is.


  • Draw your details either over your branch’s layout lines or erase your layout lines (now’s the perfect time to do that)
  • Remember: follow the form of the tree (a cylinder)
    • This means to draw your details following the cylindrical form of the tree stems, so instead of just drawing straight lines, draw curved lines for the branch’s texture
  • You can add little broken off branch tips if you like for a more jagged feel or a few leaves
  • If drawing a branch is too simple for you, try adding a trunk
    • Like a branch, the tree trunk is also cylindrical
    • You can sketch it out either when you’re starting to layout your tree branches with simple lines or at after you’ve finished drawing them – just make the sure the finished quality of the tree trunk matches the rest of the branches
  • Make your details lighter than your outside lines

Hooray, you’ve just drawn a tree branch drawing freehand, whether you made it simple or detailed!

Add it to your art journal or sketchbook if you’d like.

If you want a bit more of a challenge drawing trees, check out this these Palm Tree Drawing Tutorials with no Art Experience.

7. Bonus : Add Some Simple Shading if You’d Like

To give your sketch that extra level up, you can add a bit of shading to your drawing for a bit of dimension or realism.


  • Again, follow the form of the cylinder
  • You can start from the bottom of the tree branch (or trunk) and start drawing multiple lines across the form, side to side
  • You don’t need to shade the entire drawing, just enough for it stand out
  • Keeping your shading simple and clustered together and in broad/thick strokes really helps define and layout your drawing better, making it more recognizable
  • If shading with a pencil, take a look at this quick guide on types of graphite drawing pencils.

Want to draw more nature? Check out these simple drawing tutorials of How to Make Mushroom Drawings Step by Step or How to Draw Clouds with Pen & Ink Easy.

Simple Drawing Tutorials, Art Tips, & Cheats to Help You Start Drawing Immediately

Now you know how to start drawing a tree branch freehand, super simple!

The article How to Start Drawing a Tree Branch Freehand, Simple was originally published on Drawism.com.

Report

Art Success : 10 Brutal Truths Before You Start Drawing

Article / 02 December 2023

Drawing can be incredibly fun, therapeutic, and mentally freeing. But it can quickly become overwhelming for many reasons, most of which we’re usually not prepared for. These can include creative burnout, perfectionism, or a fear of what you’re picture may turn out to be (art expectations). But you’ll be ahead of other artists and improve your art much faster as long as you understand 10 of the most common mindsets and art tips to have before you start drawing, either as a hobby or a career.

10 Brutal Truths About Art Before You Start Drawing

1. Your First Few Drawings Are Not Going to Be Your Best

Think about your first time doing something that wasn’t easy when you first tried it. Was it learning to ride a bicycle, tie a shoe, learning how to cook, or anything else similar? I’m going to guess it wasn’t easy your first time.

It’s the same when you start drawing for the first time.

Because you may not have experience drawing before, the concept of drawing can feel vague.

Like everything, drawing normally takes lots of time and practice for you to get good at.

  • It relies a lot on hand-eye coordination which is very difficult to control when you first start drawing because you’re relying on 2 sensory pieces of information: 1. making things look right and 2. controlling your hand and wrist movements to create an image.
  • Drawing also relies on muscle-memory.

If you lower your expectations of the outcome, you’ll put less pressure on yourself and let your creativity flow naturally, resulting in most likely a more interesting artwork.

2. Drawing is a Slow Process Before You Start Seeing Big Results

As mentioned above, there are a lot of factors that go into drawing, whether it’s self taught drawing or going to an art school. And that’s not even learning things like anatomy or shading!

I don’t mean to scare or overwhelm you when you start drawing but I want you to be prepared with the correct art expectations for when these things most likely may pop up in your creative process because not only can they be major setbacks for your artistic goals but they can creep up without you realizing them.

Learning how to draw and how to draw well is not going to happen overnight. I hate to break it to you but for 90% of us, it’s the truth. It took me at least 3-4 weeks of drawing everyday (I was in an art school at the time) to notice improvement.

When you first start drawing, a majority of the time (depending on your goals) will be spent acquiring the basic skills needed to create a recognizable image.

Basically, you’ll be spending time making things look correct and learn things like precision and coordination. In my eyes, those are more important than making a cool image because those principles and art tips teach you how to understand and master the process of drawing, first.


3. There’s a Lot of Competition When Applying for Art Jobs or Standing Out as an Artist

The reality is, there is no shortage of artists nowadays.

Artists are everywhere from social media, to the internet and tv, whether they’re professional or have learned self taught drawing.

The amount of competition to be seen as an artist both on social media and when applying to jobs can be difficult to overcome and comprehend, not to mention the toxic social media art habits that can send you spiraling into a whole dimension of mental health issues that can set up unrealistic art expectations.

Some important art tips to keep in mind to combat this when you start drawing:

  • What type of art do you want to make?
  • Then ask yourself : How does your art stand out from the thousands of other artists competing to be seen ? What makes your art unique?
  • It’s extremely difficult to get large followings on social media platforms nowadays, as the algorithms require you to constantly post your work (sometimes every day) which can lead to you burning out, fast. Unless getting a large social media following is your huge goal, avoid it for now and just focus on getting better at your own art.
  • You don’t need to have an artistic goal with what you want to achieve with your art (that’s something that will come with time). But it will make it easier for your work to stand out when you have a general direction of where you want to go with it.
  • No matter what you want to achieve with your art, try to start drawing now, stay consistent with it (it doesn’t need to be every day), and you’ll eventually reach your goal. It doesn’t matter if it’s 3 months, 3 years, or even decades from now, as long as you keep at it, you’ll get there.

For an in-depth look at using social media for art and it’s pros and cons, check out this extremely helpful article on Why Being an Artist on Social Media is a Competition & what you can do to beat it.

This leads me to the next important point:

4. Be Prepared to Spend a Lot of Time Drawing

Whether you want to make money off your art, work for an animation studio, teach your own art classes, or show your work in galleries, you’ll need to spend a lot of time drawing – and I mean A LOT.

Why?

Depending on what you want to draw, there are so many different artistic concepts to understand when you first start drawing.

For example, if you want to draw cool portraits or characters, you ‘ll need to understand basic anatomy, shading (aka “value”), and some perspective. And that’s not even going into color which is a completely different subject on it’s own, as it involves things like lighting, color temperature, and color theory!

Each of these concepts takes serious time to understand from both an intellectual, and then a physical standpoint.

They all require you to understand the idea first, and then be able to mimic it in real time, using hand-eye coordination.


For a professional, it takes years to get good at drawing.

You may have heard one of these art tips before but to get really good at something, you must spend approximately 10,000 hours to become a pro. This isn’t true for everyone but my point is it’s going to take time for you to get good at making art, if this something you’re serious about pursuing.

Tip:

  • Start drawing. Now.
    • You’ll need time to understand basic things like precision and hand-eye coordination, for starters, esp. if you’re doing self taught drawing.
    • You can pick up more advanced skills like shading and color later on.
  • Pick one basic drawing concept and focus learning that technique(s) for a few weeks.
    • It’s so easy to get overwhelmed so focus on one thing for now.
    • It can be drawing simple shapes, perspective, or just drawing an object, like a nose or lips.
  • Try setting aside some drawing time every day, week, or 2 weeks.
    • It can be as little as 5 min but it will add up and keep your brain creatively active and progressing.

Setting mindfully healthy art expectations can make a world of difference in your artistic journey.

If you want to learn how to draw the right way but have no artistic skills or experience, check out this in-depth guide on How to Start Drawing with No Art Experience, with my most important tips, what you need to focus on, art supplies, & easy drawing exercises to get you started now!

5. Get Ready to Make a Lot of Mistakes and Be Prepared for (Many) Failures

Going back to point #1, a lot of your first drawings probably won’t be your best.

And if you think they are now, they won’t be in a few months if you keep drawing, because you’ll most likely be a better artist by then!

Back at art school I remember something one of my instructors told me that I’ll never forget: “Those first few drawings are not going to be your best. You have to draw all the crap out before you draw the good stuff.” Or something like that.

Maybe it’s because it was so funny that I’d remembered it but it’s so true.

You need to fail, make mistakes and take risks, and then learn from those mistakes. Knowing how to draw well is just as important as knowing what not to do when drawing. And that in turn makes you a better and more efficient artist.

It’s 100% perfectly fine to fail. As long as you learn how to make your drawings better, you’ll keep improving and become so much better because of it.

A great way to look at this is to see failures and mistakes as 1. progress, and 2. a way to become a much better artist.

6. Not Everything Will Make Sense to You at First

It takes time and dedication to understand the most basic of basic principles when you start drawing, no matter if you’re taking an art class or going the self taught route.

Having low art expectations at first will really help you understand basic art techniques while helping you learn how and what methods and styles of learning work for you.

So take your time and enjoy the process now. Your art will eventually get better.

Also, make sure to write down any drawing or art tips that help you understand the material or help make your art better – drawing principles are a lot to memorize and easy to forget. I like to make a little journal or art notes I can reference if I ever need to remember a few techniques.

7. Getting Yourself to Start Drawing Everyday is an Achievement, Not Something that Happens Naturally

Whether you’re on social media, an art-based website, or listening to art teachers or recruiters, you’ll most likely hear “you need to draw everyday”, if you want to be successful at art.

And you’ll hear it – A LOT.

While this sentiment is true, it’s not always necessary for everyone, especially when you first learn to start drawing.

It’s not like you just start drawing everyday out of nowhere, just like that. As I’ve personally found out, it takes time, planning it into your schedule, and most importantly, getting into a mindset where you feel you’re not being forced to “draw everyday”, otherwise your mind will tell you not to do it, like in my case.

Your want to draw needs to happen naturally for you to get to the point of ‘drawing everyday’.

Not only does “drawing everyday” set up unrealistic expectations of your productivity and quality of your artwork, it can be one of those pesky toxic social media art norms that you can suddenly find yourself spiraling into, that can negatively affect your mental well being.

Instead, take your time time drawing and figure out what you like about it. If you want to pursue drawing professionally, then you will have to draw more often but maybe not every single day. See what fits into your schedule right now and make do with the time you have.

Remember: drawing everyday should come naturally because you want to do it, not because it’s forced out of you from external places (other artists, social media, recruiters).

Give yourself a pat on the back or treat yourself to a reward if you do get yourself to draw everyday because it is no easy feat, you deserve it!

8. Social Media Can Halt Your Progress as an Artist

While posting your art on social media seems like a fantastic way to get your art seen and a possible following, it’s actually more toxic to your mental health and creativity.

When you post art to social media, you’re actually competing with millions of others on the platform just to have your content seen, in addition to fighting with the platforms’ algorithms, you’re relying on external gratification and validity. When these two things don’t come from you, you can become more sad, anxious, even depressed at times, lowering your motivation, focus, and mental well being.

It’s so difficult and distracting to keep up with social media while learning to draw.

These toxic social media art pitfalls can be detrimental to your artistic progress because it sets you up for unrealistic art expectations (that can be unreachable w/your current skills).

You’re most likely looking at other artists’ work on the platform as well. This can greatly influence what type of art you produce and can even sway you from your unique style and voice.

To help solve these issues, just stay focused on your studies right now. Your hard work will show through in your art now, not necessarily your followers. Followers can come later once you’ve gotten into your own groove and process of drawing.

Here’s a quick list of the damaging mental effects social media can have on you and your artwork, Social Media for Art: 10 Dangerous & Lasting Effects on Your Mental Health.

9. Not Everyone will Like or Appreciate Your Art

And that is 100% okay!

Just start drawing.

Everyone has their own preferences of art they like as I’m sure you do too, and it’s totally fine if your art doesn’t fit their bill.

It’s just like food. I have my own culinary preferences like ramen, mac and cheese, and low sugar ice cream.

You’re making art for YOU, because you want to. You’re not making it for anyone else, so don’t ever feel bad or take it personal when someone may not outright ‘like’ your art.

If it’s an art critique, take the negative points as constructive criticism and improve those areas to become better.

For this point, some art tips to keep in mind: it’s very important to have confidence in your own artistic abilities and skills. But be self aware enough to know where you need those improvements and how you can become a better artist.

10. Be Prepared to Receive Criticism Both Good and Bad

Whether you’re in an art class, showing off your work at a gallery, or just showing your self taught drawing pics to a few friends and family, someone will ALWAYS say something about it, good, bad, or both.

It’s one of those expectations that comes with making art, whether you’ve started drawing for 10 days or 10 years.

Receiving prompted criticism in a professional setting is a stepping stone for becoming a successful artist. I can most likely guarantee that every successful artist, including today’s top artists, have had at least a few bad pieces of art in their early days and received some sort of art criticism. But what makes them stand out, is that they most likely listened to the professional’s advice to create better artwork.

Knowing when to fold and put your ego aside to become better at your craft is a trait the most successful artists have and why they are so successful.

If someone says something bad about your art on a whim, don’t take it personal, it’s definitely not you. And if it’s art tips and criticism from a mentor or teacher, definitely try to improve those areas because you’ll be a much better artist than yesterday.

More Easy Drawing Tutorials, Art Tips, & Cheats

The article Art Success : 10 Brutal Truths Before You Start Drawing originally appeared on Drawism.com first.

Report

Realistic Sci Fi Digital Painting Key Frame & Art Process

Tutorial / 25 November 2023

Recently I’ve been making new artwork for my portfolio to give it a little boost and show some of the new skills I’ve been learning, a little art update you could say. A new artwork I finished earlier this year is a realistic digital painting / digital art background of a chase at night in a futuristic city, seen below. The artwork is created in the style of a key frame concept or a semi realistic illustration.

In this post, I’ll give you a sneak peek at my art process when creating realistic and detailed digital art.


  • Key Frame Concept — A concept painting that is used to establish the mood and feeling of a ‘key’ (important) scene in cinematics that’s relevant to the plot.
  • Illustration — An image representing an idea, concept, or text that is used for digital or print media.

Sci Fi Art | Night Chase Realistic Digital Painting

The key frame or illustration I created is my take on chase happening in a futuristic sci fi city.

The digital art background has towering buildings and skyscrapers against a sky filled with dappled lights.

The picture shown is the finished piece.


I have some difficulty creating dynamic artwork, partly because my main focus are backgrounds and environments which are usually pretty static. So, I’m not too much of a character designer. 

But placing characters in a scene can really help tell a story and show action, where landscapes normally don’t.

For this image, I wanted to show a character being chased by some bad guys because it gave me an opportunity to create some characters in a scene and show off some dynamic character poses with art reference. 

I loved the idea of a vigilante jumping between buildings to make it seem like he was almost flying through a spotlight.

I chose to create the scene at night to give a more dramatic feel and to give the city a darker side (no pun intended).

Normally I don’t spend more than 8–10 hours on an artwork (depending on what it is). But for this piece, since I was applying a few new techniques and creating a realistic digital painting, it took me longer because I was processing the information while also figuring out how to replicate the commands in a digital art program.

How I Start Creating a Digital Art Background

As detailed as the final image looks, I take a good amount of time to plan things out first before I make a finished piece. Doing this speeds up my process so I don’t spend countless hours trying to figure out what’s working while trying to come up with color, value, or anything else at the same time — it’s so much work & really slows you down!

It’s so much easier for me to do things step by step especially when creating a realistic digital painting in a sci-fi art style.

Sketching

My first step is to draw a quick sketch.

I make these as basic as possible so I don’t get caught up in wasting time on unnecessary details. It really slows you down and keeps you from focusing on the bigger picture (again, no pun intended).

Since I wanted to draw a chase scene, I sketched in some buildings and blocked in a couple characters.


Once I had a composition I liked, I updated the art by filling it in with value, as seen above.

Value is how light or dark an object is. You may probably recognize the term as ‘shading’ instead.

Adding very simple value or shading to my sketch helps me establish a general idea of what the final image will look like, along with a final lighting scenario. 

This sketch is important because I use it as a base or reference image when creating the final version.

If you’re a beginner and would like to learn how to draw the right way & be successful at it, check out this helpful post on How to Start Drawing with No Art Experience, filled with the stuff art teachers don’t talk about!

Making a Digital Art Background

Normally, I would just start painting in details at this stage but for this art update portion, I used 3D to help me block in the surrounding area to speed up the process.

I made some basic shapes and blocked in the ‘futuristic buildings’.

The 3D program I used is Blender. 

What I love about Blender is that it’s a powerful 3D program great for beginners like myself and best of all, it’s free! You can click here to download Blender for free and start experimenting with some modeling!


I tried to get my 3D block-in as close to the buildings in my sketch as possible while also trying to match the angle I drew.

Since the 3D image is a base, I made some updated art changes to it, so it matches better with what I was going for.

Painting a Realistic Digital Painting by Adding Color & Details

Once I made changes to the 3D block in, I started painting over the image in a digital program.

I use Adobe Photoshop since it’s an industry standard.

As you can see between the above and below images, I removed some elements from the 3D render that weren’t fitting in with my original sketch.

For this next part, I added some color and started adding details to the buildings to help make the whole scene come together.

I started defining some of the characters a bit with some light detail.

In this stage I’m experimenting a bit with digital art background effects like rain and smoke. It helps give this sci fi art a more realistic digital painting effect.


I liked the look of those realistic illustration effects but ultimately took the rain out because it was too distracting.

It’s important to self-critique your work, especially when working making art updates or towards a finished piece or giving it a little art update because you can start catching what elements are working well and which ones need to be improved. It’s a quick way to train your eye into recognizing compositional mistakes and will improve your drawing skills immensely.

Final Realistic Illustration in a Sci Fi Art Style

After a lot of detailing, self-critiquing, and refinement of characters, I finally ended up with the realistic illustration you see below — a mysterious chase scene with both the city and characters in question, shrouded in darkness.

As the chase commences, a futuristic cop on the bottom left catches a glimpse of the action just in time, while the hero seemingly glides across the towering rooftops avoiding the grasp of his pursuers.


Check Out More Amazing Artwork & Drawing Tips!

If you’d like to see more amazing artwork or want to start making your own, check out some of these inspiring and helpful articles below!


The article Realistic Sci Fi Digital Art Painting originally appeared on Drawism.com first.

Report

How to Start Drawing with No Art Experience

General / 19 November 2023

Drawing is a fantastic form of expression whether you want to visualize your emotions, how you’re feeling, want to illustrate an important moment in your life, or if you just want to make something that looks cool. Whatever you want to draw, anyone can learn how to start drawing with no art experience or artistic background- zero. We all start from no experience, including myself. Think of it as starting off at Level 1 – you learn more skills and techniques the more you practice and you don’t need to spend money on art classes right away or even spend any money at all!

This article will guide you with art inspiration, easy drawing exercises, drawing idea starters, and even cheap drawing supplies to properly equip you with everything you need to learn how to start drawing with no art experience, now.

CONTENTS

  1. Have a Drawing Mindset
  2. Art Inspiration
    • Mood Boards and Art Reference
    • How to Make a Mood Board for Art
  3. Start Drawing
  4. Cheap Drawing Supplies
  5. Easy Drawing Exercises
    • Drawing Exercises for Line Control and Precision
    • Gestural Drawing Exercises
  6. Drawing Idea Starters

How to Start Drawing with No Experience

1. Have a (Flexible) Drawing Mindset

You probably want to get started drawing right away. I know the feeling and I totally get it – it’s super exciting, fun, and you get to draw cool pictures, even your own ideas! Not to mention shopping for all the cool or cheap drawing supplies or maybe you want to get started with a few drawing idea starters. But, I’ll get to that later.

Right now, I first want to talk about having a flexible drawing mindset.

Why?

Because this type of thinking grounds your mind and your expectations before you even get started on making art and is perfect for anyone who wants to learn how to start drawing with no art experience.

Why is having a flexible drawing mindset so important?

  • Having a flexible drawing mindset is my #1 must-do tip before I get started on any art project because it sets expectations for what I want to achieve vs. my current skill set.
  • It grounds artistic expectations to reality so that you’re not (a) starting off with something complicated which in turn (b) prevents creative burnout that can possibly lead to you giving up on your art or getting in your head that “you’ll never be good enough”.
    • I know this sounds a bit extreme but is entirely possible as many artists including myself have felt this way due to multiple external factors.
  • It’s a fantastic way to set low expectations from the beginning so that you won’t be disappointed with what your completed drawing or artwork may look like.
    • Having low expectations when drawing actually sets you up for success, not failure because it puts you in a growth mindset instead of a fixed mindset
  • It allows for a growth mindset meaning that you understand you can get better at art the more time and practice you put into it. And I have a feeling you will!

A flexible drawing mindset is a must for anyone who wants to know how to start drawing with no art experience. Now the big question is, what does this attitude on art ‘look like’?

What is a Flexible Drawing Mindset?

  • Having low expectations for the outcome of your artwork
    • It’s 100% fine if your drawing isn’t perfect, the main goal starting out, is to have fun
  • Knowing that you can always improve your current skills to get to get to where you want in art
    • You don’t need to stick with the same or current skill set forever – get an upgrade with a class or new art program once you feel confident in your other artistic skills
  • Know that drawing with no art experience is the best place to start and learn how to do it
    • Everyone starts with no experience, even the most popular artists
    • There’s nothing to be ashamed about
  • Try to not compare your art to other artists (especially more accomplished ones) as it boxes you into not improving your work as well as spawning negative, progress-halting thoughts
  • *Be Confident in Yourself and your Artistic Abilities a Majority of the Time
    • This is especially important because it serves as a basis for long-term motivation, inspiration, and persistence to make awesome things happen with your artistic skills
    • It will keep you progressing in your creative efforts even when you may feel you’re lost in the process or have hit what seems to be an impassable wall
      • These walls and blocks can always be overcome with enough practice and time
  • Understand that good things always take time including drawing
    • Being good at drawing is never an overnight thing, it takes months if not years to start seeing any major improvements
    • For now, enjoy the process and don’t worry about your art being ‘perfect’
  • *Failing Is Progress
    • It’s okay if you feel you’ve failed at first but failing is always progress because you’re learning what to do right and what things you should avoid next time
  • When an artist makes drawing look easy and quick = it means the artist has spent years mastering it
    • Don’t feel bad if another artist made a work that took them 3 hours when it may take you closer to 10 or more
    • Learning drawing techniques and how to get from Point A to Point B is a slow process at first but will get faster the more you practice it
  • Be easy on yourself and understanding of your current skills
    • Be Semi-strict with yourself but also comfortable in your learning

To make the drawing process easier for you, check out these 10 Brutal Truths Before You Start Drawing to help you set realistic expectations of your art and skills and always succeed!

Let’s get into art inspiration.

2. Art Inspiration

Gathering a bit of art inspiration when you don’t know how to start drawing with no art experience is an another important part of the learning process and will help speed you up in your art creation.

It’s incredibly easy to get overwhelmed on what to draw , especially when you’re starting.

To fix this, you can make a short list of things that you like or want to draw. Stick with some very simple objects. I wouldn’t recommend starting off with a full face, person, or animal because there’re so many different shapes and planes involved that it can be very overwhelming at first. If you still want to draw a face, pick an aspect of the face you want to draw, like the lips, eyes, or nose.

If you have trouble coming up with things to draw, here’s a quick list of easy art inspiration and drawing idea starters to get your creativity running.

Mood Boards & Art Reference

Whether you’re a visual learner like me or a wizard at listening to understand concepts, a mood board is an invaluable resource to anyone working on a creative work or project.

A mood board is a visual representation of multiple ideas, objects, and / or people that collectively represent your idea, concepts, or what you want to draw, in an organized manner using reference photos.

Reference photos are pictures that are used as visual representations for creating art, that provide a base point or foundation of (sometimes an accurate) what the subject looks like. They’re used as guides to make drawing things, easier.

Easy drawing exercises like creating a mood board is a great way to kick start your creativity because it helps you visualize your drawing target and gather all your ideas onto one page. It organizes everything and takes out the guessing of what an object is ‘supposed to look like’ (what you think it looks like) vs. what it actually looks like in reality.

I can’t tell you how many times I’ve drawn something thinking I know what it looks like only to pull up a reference photo that looks entirely different. Think a chair or a light bulb. Yup, it happens to me too.

Here’s a sample below of one of the mood boards / reference sheets I made when practicing how to draw buildings. I placed notes on the side to help focus on what I want to draw without getting carried away.


How to Make Your Own Mood Board with Art Reference Photos

  1. Gather art reference photos of simple things you’d like to draw
    • They can be photos taken with your (digital preferred) camera or found online by searching the internet
    • Stick to 2-4 reference pics per subject so you don’t get too overwhelmed- keep it simple
  2. Organize your photos either on a desk or if digitally, in a digital art program
  3. If you have different subjects, arrange your photos by subject so they’re easier to find
  4. Once all the photos are arranged how you want, feel free to print them if you want to have something on hand as reference

Now on to art supplies!

3. Cheap Drawing Supplies Vs. The Expensive Stuff

Before we start drawing, let’s talk about drawing supplies,

I know it can be tempting to go for the best papers, paints, markers, newest tablet, and any other fancy art supplies right away. But it’s important to get yourself familiar with the process of drawing first, to see if it’s something you even enjoy or want to continue with.

For some of you, drawing might not be fun. In which case, it’s great you saved your money.

But for the rest of us:

Art supplies can get expensive quickly, even if they’re ‘not the best’.

I remember spending over $100 easy just on markers alone pre-pandemic, so it’s important to keep a budget in mind from the beginning of your art adventures since it will help you be more mindful of, and help you plan for these costs in the future.

And no, you definitely don’t need the ‘best’ art supplies to make amazing art. Creating great art is 90% dependent on your skills, not what you use.

When drawing and sketching, I use a medium ball point pen that I get at a department store with copy / printer paper.

Nothing fancy. At. All.

*What’s more important to keep in mind is what materials you enjoy using and what you feel works best for you in your art process, especially if it makes it easier and more efficient for you. It doesn’t matter if you have a $1200 drawing tablet with a screen or a $70 USB tablet you bought off eBay (<- that’s me). If you don’t like what you’re using, it will interfere with your art and process.

  • Prices have gone up for supplies in the U.S.
  • If you’re spending over $25, you’re already going over budget
  • You can draw for free by using the materials you already have in your living and/or office space

Here’s a quick list and tips of cheap drawing supplies for those of you with no art experience how to start drawing.

*I want to keep the materials specific to cheap drawing supplies at first so you’re not wasting time or money on an investment you may not be sure about yet. Keep it simple at first.

Drawing Materials

A Drawing Tool

  • Anything you have lying around works great (doesn’t matter if it has an eraser or not)
    • Markers
    • Pencil – Preferred
    • Pen
    • Tablet Pen (for digital)
  • Drawing Surface
    • Traditional
      • Any type of paper that doesn’t have a glossy finish
      • Copy / printer paper works well
      • You can even use things like index cards or post-it note pads
    • Digital Tablet or Phone
      • Tablet Devices
      • Plug & Play Digital Drawing Tablets with USB cords (no need for the fancy screens right now)

Once you have all your art materials and a few reference photos ready (if you like) it’s time to finally get started with a bit of drawing!


4. Let’s Start Drawing!

It’s important to get your feet wet with a bit of drawing to get your mind into a creative mindset and exercise those drawing muscles.

  1. Set a timer for how long you want to spend on your drawing session
    • It’s very easy to get carried away while having other responsibilities
    • Try keeping your first few drawing sessions to 15min -1 Hr to start
    • Be confident and it’s okay if you make mistakes
  2. Make a Simple Goal for what you want to accomplish this session
    • It keeps you on track and focused on what you want to create and how you can improve
    • It doesn’t overwhelm you in all the things you feel you need to accomplish right now
    • Here are some simple goals to start and get some drawing ideas going
      • Want to just draw whatever you feel like? Ok!
      • Or have something particular you want to draw? Write it down and start drawing.
      • Do you want your drawing to look right?
      • Do you want to draw for fun or maybe a bit of relaxation, like for art therapy?
  3. Start Drawing Very Simple Shapes
    • (Using your photo references) Whatever you’re drawing, look at the big picture
      • This means to look at the overall big shape you see when drawing an object, minus the details inside of it – trains you to recognize basic shapes and sketch more complicated drawings faster
      • For example, if drawing a nose, the entire larger shape of the nose is a triangle, where as the nostrils and tip are the details inside of it – smaller triangles
    • Try your best to not focus on super fine details at the beginning, it will slow you down and can shift your focus to something less important than the ‘bigger picture’
    • *Everything is made out of the core shapes : cube, cone, cylinder, sphere
    • Try drawing simple shapes like a triangle, square, circle, or rectangle to start, then try adding details to the overall shape
  4. Get Used to Your Drawing Tool
    • While drawing, notice the types of marks you make and the differences you notice when you apply more or less pressure
    • *In general : more pressure = darker thicker lines, less pressure = lighter and thinner lines
    • Your drawing tool is what you use to transfer your creativity onto paper
      • Think of it as en extension of your arm that you need to train and understand how it works
  5. Give Yourself a Pat on the Back When You’re Done!
    • Drawing can seem daunting when learning how to draw with no art experience
    • Becoming better at drawing takes a lot of time and is a slow process at first but you’ll get better the more time and effort you put in
    • Making those first few steps to physically draw is a huge accomplishment and now you have something to show for it!

Now that you have a good idea of how to start drawing even when you have no art experience, you can try some easy drawing exercises below to get you started, or continue with your art adventures.

5. Fast & Easy Drawing Exercises

To speed up your art, easy drawing exercises are a perfect place to start any daily art routine.

Drawing exercises are simple techniques that improve your art skills fast and anyone can do them, such as drawing straight lines or circles.

  • Some of these easy drawing exercises use repetition which not only improve your hand eye coordination but improve your muscle memory, helping you to create cleaner and more precise-looking art.
  • The repetition may seem a bit boring at first but it will improve your drawing skills fast.
  • Doing easy drawing exercises before starting on your main art project, can be used as ‘drawing warm ups’ to help loosen up your muscles and get you to sketch with more gesture and fluidity, making your art look more natural and dynamic instead of stiff and straight.

Here are some quick sketching exercises when learning how to start drawing with no art experience.

They’re so easy!

Easy Drawing Exercises for Line Control & Precision

Have you ever felt that when you draw, you just feel out of control when holding your pencil and can’t seem to make your picture look ‘right’?

These art warm ups focus on hand-eye coordination.

They train your arm and hand muscles to move in specific directions and really help you gain control and precision of what you’re making.

  • Connect the Dots
    • Draw 2 dots anywhere on the page and then draw a straight line from one dot to another
    • Do your best to touch both dots (it’s okay if you miss at first, keep trying!)
  • Draw Circles
    • Loosely draw circles on your drawing surface for 3-5 minutes
    • You can fill up your page if you like
    • This helps loosen up your arm muscles and trains you to draw curved lines
  • Draw Over a Line 3-5 Times
    • Try your best to draw a straight line
    • This time, draw over the line 2-3 times at first, making a darker, thicker line
    • This helps your control and precision by drawing over something more than once, helping you to replicate your sketching skills

These drawing idea starters may be a bit difficult at first because they rely a lot on controlling the movements of your hand, which can actually feel like you’re out of control, especially when learning how to start drawing with no art experience. That’s normal.

Nailing down precision doesn’t happen over night. It might take you some time to get the hang of it. But if you find these drawing exercises too constrictive, below are some techniques that rely on movement and gesture. Basically, easy drawing exercises that are fluid and open-ended.

Gestural Drawing Exercises

These types of drawing warm ups focus on movement and the feeling of drawing, not so much the end result. You could even argue these could be a type of abstract art.

  • Continuous Line Drawing
    • Using 1 line, draw anywhere on the page without lifting up your drawing tool for 3-5 min.
    • Focus on moving your hand across the page rather than the end result
    • You can make any type of gesture or marking, whether it’s swirls, scribbles, or doodles, just don’t lift up your pencil / (tablet) pen
  • Automatic Drawing
    • Like the previous exercise, just draw, move your hand, and make markings on the page
    • Only difference is that you can lift up your drawing tool from the page
    • Start with 3-5 minutes
    • Try making crosshatch marks (multiple short lines next to each other that indicate shading), dots, circles, and anything else you can think of
    • *Don’t think about what you’re drawing, just keep your hand moving – it teaches you muscle memory, gesture, and a wide range of movement while building up your line confidence
  • Gesture Drawing Figures
    • Try setting a timer for 30s to 1 minute
    • Instead of drawing the full figure, focus on the figure’s movement by drawing only lines or curved lines that represent the person, trying to not get into any detail at all
    • This helps you focus on making dynamic lines and focusing solely on movement, helping to bring your drawings to life
    • Check out Line of Action for free timed figure drawing sessions you can set yourself, with photographs of figure models

Let’s move on to some easy drawing ideas.

For more gestural drawing ideas, check out these 5 Relaxing & Gestural Drawing Ideas of People or 10 Expressive Art Therapy Activities you can try now, no art experience needed!

6. Drawing Idea Starters

If you’re still stuck on what to draw or need some quick inspiration to jump start your creativity, here are some great drawing idea starters.

Quick Drawing Ideas for Starters

For an even better drawing experience when you’re first starting out and to improve your drawing fast, you can grab my printable Free Drawing with Art Therapy Printable Activity Sheets with easy drawing exercises that are mentioned in this post to start creating right away!

Easy Drawing Tutorials, Tips, & Cheats When Learning How to Draw with No Experience

Now you know how to start drawing with no art experience, like a pro. Feel free to leave your thoughts in the comments below!

The post How to Start Drawing with No Art Experience originally appeared on Drawism.com first.

Report

Cool Super Mario Fan Art & Effortless Mario Drawing Ideas for Beginners

Article / 11 November 2023

Ready to see some cool Super Mario fan art created using both traditional and digital art that feature some memorable locations and power ups? 

Keep reading to check out these awesome images along with a list of effortless Mario drawing ideas and art style tips to give your creativity and art inspiration level up!


CONTENTS

  1.  Cool Super Mario Fan Art Inspiration
  2. 25 Creative & Easy Super Mario Drawing Ideas
  3. How to Draw in the Super Mario Art Style
  4. Types of Super Mario Fan Art
  5. More Exciting Video Game Art & Drawing Tutorials 

Cool Super Mario Fan Art Drawings & Inspiration

1. Question Block in the Super Mario Art Style

Who doesn't love a good ol' Item Block?

If you want to draw very simple but extremely iconic and cool Super Mario fan art, try drawing a question / item block.

These iconic cubes are not only super cute but anyone can draw them. They're yellow colored cubes with a giant white question mark that contain a range of power up upgrades to give Mario (or whoever you're playing as) special abilities like flying, throwing fireballs, or even turning into a raccoon!

The painting below is an item block with a bit of a forest background reminiscent of the Super Mario World art style.

The image below is made of gouache - a water-based paint that is thicker than watercolors but thinner than acrylics.


Personally, I love painting backgrounds and landscapes.

So, I wanted to add a bit of background with trees and soil in the classic Mario art style to add a more interesting composition and look to the item block.

The colors I had on hand to paint these types of Super Mario fan art drawings are less bright than the art you see in the games but still highly saturated because these are colors that are normally used in plein air painting - a style of painting that involves natural looking earthy tones that are less bright in order to mimic the effects of natural atmospheric light and landscapes.


2. Cool Buzzy Beetle Super Mario World Fan Art

This next cool Super Mario fan art is based off the Buzzy Beetle found in Super Mario World for the Super Nintendo Entertainment System (SNES - the classic 16 and 32-bit pixelated games). 

Go retro games!

I wanted to paint this little guy because like the reasons mentioned above, it's one of those very simple Mario drawing ideas, especially when using an art medium that takes a bit of time to get used to, paint.


Not only is the Buzzy Beetle easy to draw due to the simplified Mario art style found in the games but it is something that you can finish quite quickly. 

I love working on art that seems effortless to make because I can move on to the next idea fast without spending hours noodling on one piece.

Note: I may have added a bit of a protruding nose to the character design because I originally thought it was a hedgehog from the 16-bit pixel art design. Working from pixel art can be tough as smaller details can be hard to differentiate. So try to find a reference image that isn't pixel art, like concept art or another artist's artistic render when making your own fan art.

Working on fast drawings not only speeds you up in your art process but it's great for making content fast when time is a huge factor in, especially when it comes to social media and you need to keep up with an algorithm.

Basically, working on simple types of (Super Mario) fan art boosts your overall quantity in art output and can actually help you in beating the social media algorithms if gaining a social following is one of your goals. It's because not only do you have existing reference and IP to pull from but you're not spending time coming up with a design.

Some character designs can take up to 2 weeks depending on what a client or studio asks for or even more! 

So making fan art can definitely be a time saver, especially if you're short on drawing ideas and need to come up with something quick.

3. Super Mario World Backgrounds

One of my favorite aspects about the Mario art style is the elongated rounded shapes and eyes that can be seen in some classic Mario backgrounds and environments.

There's something about the soft rounded shapes that seem very fun, cute, and inviting. It's because the backgrounds are so unique and different from other games when I first saw them. I just love their simplicity.

So, for one of my last Mario drawing ideas, I decided to paint a background from one of the earlier games - Super Mario World.

The painting below illustrates a typical background in the Mario art style. 

Since most fan art focuses on characters, I wanted to create one of the more rare types of Super Mario fan art- backgrounds and environments.


I stuck with the games' visual style by sticking with simplified shapes and rounded edges throughout the entire piece.

The green forms in the back are supposed to be green mountains, hills, and foliage.

I threw in a couple of squared item blocks in front of the greenery add a more 3D look to the scene. You can't make cool Super Mario fan art if you don't have at least 1 item block or notable symbol in one of your designs.

Some other details I added were making the clouds in a similar rounded rectangular shape. I did this because when drawing in a particular visual style, it's very important to make the rest of the artwork look cohesive. All elements in an artwork need to look like it belongs in the rest of the scene.

For example, if I made the clouds look realistic, as cool as that would be, it wouldn't match with the foreground elements and item blocks because the clouds wouldn't be as simplified as the rest of the painting. If anything, the realistic clouds would look very out of place. Almost as if they were copied and pasted into the image. Very confusing and inconsistent.

So if you want to make some really cool Super Maio fan art, don't forget to pay attention to the overall style you're going for and try your best to make it look cohesive.

For awesome Mushroom drawing ideas, check out these 10 Dreamy Fantasy Mushroom Drawing Ideas or learn How to Make Stylized Mushroom Drawings Step by Step with this easy drawing tutorial.

Now that's you've seen one of the many types of Super Mario fan art out there, it's time to try making some of your own!

I've made a list below of how to draw Super Mario fan art with some effortless and easy Mario drawing ideas and styles that you can try right now.

25  Creative & Effortless Super Mario Drawing Ideas

Making cool Super Mario fan art is quite easy as the 'Mario' art style is stylized, cute, and simple compared to a more realistic approach found in other video games and films.

Of course, you can always draw realistic fan art if you'd like but it definitely involves more time and thought than simplified types of Super Mario fan art.

*If you don't know who or what some of the names mentioned below are, you can search for them here in this Super Mario fan website.

Here are some quick and easy Mario drawing ideas to help kick start your drawing productivity and creativity right now:

  1. Draw Super Mario as a baby, aka Baby Mario
  2. Draw Yoshi
  3. Learn How to Draw a Yoshi Egg
  4. Princess Peach
  5. Prince Toad
  6. Prince Toad's Hat
    • You can draw just Prince Toad's clothes if you find drawing the character too difficult
  7. Baby Bowser
  8. (Regular) Bowser
  9. Piranha Plant
  10. Draw a Goomba
  11. Draw Chomp - Chomp
  12. Super Mario Powerups
    • Red Spotted Mushroom ( Level Up)
    • Star (Invincibility)
    • Fire Flower
    • Mario Feather
    • Mario Leaf - Turns you into  a Tanuki / Raccoon
  13. Draw the 'Question Mark' Coin Block
  14. Sketch the Green Pipe
  15. Make a Koopa
    • The little turtle guys with green, red, and yellow shells
  16. Try Drawing some of the Backgrounds in earlier Mario Games, like those found in Super Mario Bros. and Super Mario World
  17. Draw the Coins
  18. Mario Drawing Ideas Dressing Up Sweets That are Wearing Clothes from the series' Characters
  19. Combine a Mario Character Design with Another One of Your Favorite Fictional Characters
    • It can be anything from fast food mascots to TV, Anime, Videogames, Books, and so much more!
    • *Drawing Fan Art Mashups have been pretty popular recently, try to see what you can come up with!
  20. Try Drawing Mario in a Cartoon Style
  21. Make a Pencil Drawing of Your Favorite Characters or things from the series
  22. Try Making Cool Super Mario Fan Art in Watercolors
  23. Make something in the Mario World Using Perler Beads
  24. Create Your Own Pixel Art Using Mario-themed Motifs and Symbols
  25. Design a Mario-Themed Symbol or Logo

Honestly, the list goes on and on. There're so many more fun Super Mario drawing ideas to try that I can't put them all here. 

Check out this in-depth Super Mario Wiki for all things Mario related and start making your own types of Super Mario fan art. With a long list of Mario drawing ideas and inspiration, you can use the website as reference and decide what type of Mario art style fits you the best since some of the video games have very different visual styles than others.

Pro Tip: Making fan art is a fantastic way to get into drawing or start making art because it's so much easier trying to copy something, especially when you're first starting out, rather than create an original character. It's a wonderful exercise and a great place to start practicing drawing. The only few downsides are (1) that I wouldn't recommend putting fan art in your professional art portfolio because whoever is hiring you most likely wants to see your creativity and originality and (2) selling fan art is technically illegal because it infringes on the rights and usage of the original copyright holder / creator, meaning you can be sued. Here is an article by Art in Context that goes in-depth about whether it's legally okay to sell fan art along with potential consequences.


How to Draw in the Mario Art Style

I've made a quick list of some pointers and tips to help you make draw in the Mario art style and what makes it so unique.

Style

When making cool Mario fan art, pay attention to the art style from the games. Since there're so many video games in the franchise, narrow your favorite game to 2-3 and choose 1 and focus on that 1 art style so you don't get too overwhelmed at first.

  • Simplified Shapes
  • Shapes have soft, rounded edges, not hard and sharp
  • Enemies, backgrounds, and items tend to have long rectangular eyes in some designs
  • Details are also simplified shapes
    • Details are less fine and usually big and/or blocky within main design shape 

Color

  • Colors are usually quite saturated & true to its solid color
    • For example, a red will look more like a true red than a purplish red
  • Most designs are 2-3 colors, maybe 4-5 max but no more because it can get too busy

Characters

  • Most characters are short and stout / chubby, except for a select few (princesses, Luigi)
  • Have 2-4 colors max in their designs
  • Limbs have plump rounded shapes
  • Are usually in blocky proportions

Types of Super Mario Fan Art

Because the Mario franchise is so popular, there're so many different types of Super Mario fan art on the internet made by some amazing artists.

Here's a quick list you can Google of some of the many types of Mario fan art that exists:

  • Realistic
  • Comic Book Style
  • Chibi - "Cute" Anime style with big heads and simplified shapes
  • Still Life
  • Mayan 
  • Japanese Animation
  • Japanese Wood block
  • 3D Render
  • Cartoon Art Style

Check Out More Exciting Video Game Art & Drawing Tutorials

For even more imaginative pop culture inspiration, art, and freebies, check out these other amazing and easy drawing tutorials + game related articles below!

Hope you enjoyed this cool Super Mario fan art & see you in the next post!

The post Cool Super Mario Fan Art & Effortless Mario Drawing Ideas for Beginners originally appeared on Drawism.com first.

Report

How to Draw Cute Yoshi Eggs Fast | Drawing Tutorial for Kids & Adults

Tutorial / 04 November 2023

With everyone’s favorite pipe-teleporting and mushroom-eating Italian plumber, Super Mario has been popping more into mainstream media along with his devastatingly adorable dino sidekick — Yoshi. This “too-cute” huggable dino hatches from a Yoshi egg found in the game. In this easy drawing tutorial for kids and adults, you’ll learn how to draw Yoshi egg and how to draw an egg shape in 3 minutes, making an awesome yet cute (Yoshi Mario) egg drawing like the pic below!


Grab your drawing supplies and let’s get started!


TABLE OF CONTENTS

  1. How to Draw an Egg Shape
  2. How to Draw Yoshi Egg in 5 Minutes
  3. What Are Yoshi Eggs?
  4. Yoshi Egg Colors

How to Draw an Egg Shape Easy

Before we get started on how to draw Yoshi egg, you first need to know how to draw an egg shape. All it takes are a few light pencil markings paired with some curved lines. Once you understand these basic steps, you’ll be drawing (Yoshi) eggs by the dozen in no time!

Sounds easy, right?

Just follow the steps below with this easy drawing tutorial for kids and adults. You can even scroll through to the numbered images if you really want to learn how to draw an egg shape fast!

1. Sketch the Egg’s Line of Action or Tilt

Draw a light line on your paper or drawing surface using either a light color or pencil. This is called the ‘line of action’, the main axis on which we will be drawing our egg.

If using pencil, you can erase your sketch line when you’re finished with your drawing.

I used a light gray marker below.

If using markers or any other colored material that can’t be erased, make sure the color you’re using to draw the ‘line-of-action’ is lighter than the color you’ll use to draw the egg outline, so it won’t be distracting in the final picture.


You can even draw the line slightly leaning either to the left or the right side to give your egg outline a bit more volume and dimension, similar to a real egg when it’s tilted.

2. Sketch Out the Egg’s Width

Next, lightly draw a dot on the lower 1/3 of your line, or somewhere around that area.

You can see in the pic below where I placed my center dot — right on the line towards the lower half.

Then, around the same height as where you placed your center dot, draw another dot on the left side, spaced a bit from the center line, and then one more dot equal distance on the right side.


These outer dots will be the points where the bottom circular part of the egg will change into a thinner upside-down “u” curve. Basically, where the shape of the egg will lightly converge at the top, giving your drawing that classic egg shape — an essential part of learning how to draw Yoshi egg.

3. Draw the Bottom of the Egg

For this next step, all you need to do is connect the outer dots that you drew in step 2, using a curved or half-circle line.

The finished result should end up looking like the drawing below with a sort of anchor shape.

You can use the bottom of the line you drew in step 1 as a guide to draw how deep your curve will be.


Try your best to draw your half circle as close to the bottom line’s edge as you can. It’s okay if you can’t since this type of hand movement involves more precise line control and can get a bit tricky. I sometimes have trouble doing this type of sketching.

But if you keep practicing, you’ll know how to drawn an egg shape easily!

4. Connect the tips of the lines for a Full Egg Shape

This next step is pretty darn simple, almost as simple as just drawing a line — drawing a curved line.

All you need to do is just connect the edges of the lines together but curve them to make a rounded shape — an absolute must when learning how to draw Yoshi egg.


You can do this in a couple of ways:

1. Draw 1 Continuous Curved Line from One Side of the Egg to the Other

This method is quicker but may be a bit more difficult for kids and beginners, as it involves 1 continuous line without lifting up your pencil.

I mean, you can definitely lift up your drawing tool if you need to but drawing in 1 continuous line will make your egg outline look much cleaner and professional.

When drawing this upside-down ‘U’, you can try to get as close to the top edge of the center line as it’s a guide for how tall your egg will be.

2. Draw 2 Curved Lines from Each Unfinished Side of the Egg

Okay, this may sound a bit trickier than the 1st option but is actually quite simple!

Remember the anchor shape you drew in step 3?

Well instead of drawing 1 continuous curved line from side-to-side, you’ll be drawing 2 slightly curved lines.

Just draw a slight curve from the left side of the anchor tip to the top of the center sketch line.

And repeat for the right side!

A quick tip is to draw the bottom portion of the egg as a half circle. For the top part of the egg, draw the outline as a parabola or a stretched, upside-down “u” shape.

A quick tip is to draw the bottom portion of the egg as a half circle. For the top part of the egg, draw the outline as a parabola or a stretched, upside-down “u” shape.

You now know how to draw an egg shape!

*Keep in mind that you’re sketch doesn’t have to be perfect especially when you’re drawing the curved lines. You’re doing great, as long as it looks like an egg.

How to Draw Yoshi Egg Easy

Now that you know how to draw an egg shape, it’s time to make your drawing look like a Yoshi egg!

Drawing Yoshi eggs is super easy!

Can you guess how to draw Yoshi egg from an egg outline?

If you guessed ‘drawing spots’, you’re correct!

5. Draw Circular Spots on the Egg

Once you have your egg outline ready to go, all you need to draw are the colored Yoshi spots!

And no, you don’t need to be a master at drawing circles or ovals perfectly, especially when learning how to draw Yoshi egg.

Pick 2 or 3 areas where you want to draw the spots.

Normally when drawing Yoshi eggs, the spots are usually medium-sized in comparison to the egg, meaning there’s not a lot of them and they ‘re spaced out a bit from each other, not right next to one another.

You can use my drawing below as reference.


I drew the spots in green because that’s Yoshi’s main color.

There are different colors of Yoshis, from red to purple. The color of the egg spots reflect not only the color of the Yoshi once it’s hatched but also it’s favorite fruit. So in this case, a green Yoshi’s favorite is melon, yum!

So, if you’re thinking of changing the color of the spots, then you’re Yoshi would technically be the color of the egg along with it’s favorite fruit — choose wisely.

6. Bonus : Color in Your Drawing

If you really want to go above and beyond when learning how to draw a Yoshi egg, you can choose to color in your drawing if you’d like.

For starters, I’d definitely recommend coloring the egg spots because it’s a defining feature when drawing Yoshi eggs or a Yoshi Mario drawing.

If you want a more illustrative or semi-realistic look, you can do a little bit of shading at the bottom of the egg.


You can even add a shadow for a more 3D look under the bottom of the egg by drawing a flat circle or oval right underneath it.

What are Yoshi Eggs?

Yoshi eggs are little spotted eggs found in the Super Mario & Yoshi video game series and come in different colors. Each egg usually contains a cute Yoshi dinosaur that matches the color of the egg.

So if you see a blue Yoshi Egg, there’ll be a blue Yoshi dino inside.

What Yoshi Egg Colors to Use When Drawing Yoshi Eggs?

With a range of 11 colors to choose from, sticking true to the franchise, Yoshi eggs come in different colors including Green, Yellow, Orange, Light Blue, Blue, Pink, Red, Purple, Brown Black, & White.

Whichever color you choose for your sketch, your Yoshi Mario drawing will look amazing and super cute.

Normally, each color of Yoshi represents a different fruit.

Here’s a quick guideline below of some general Yoshi colors with their corresponding fruit so you can get to drawing yoshi eggs of different colors.

Quick Guide for Different Colors of Yoshi Eggs

  1. Green — Melon and Watermelon
  2. Yellow- Banana
  3. Red and Pink — Apple
  4. Blue and Light Blue — Grape
  5. Orange — Orange

Check Out More Exciting Drawing Tutorials & Video Game Art Posts (Outbound Links)

For even more imaginative pop culture inspiration, art, and freebies, check out these other amazing and easy drawing tutorials and game related articles below!

Learning how to draw Yoshi eggs or just egg shapes in general can be difficult to get right. But with enough practice, you’ll become egg-cellent at it! Did you enjoy this drawing tutorial? Leave your thoughts in the comments below!

The article How to Draw Yoshi Egg Fast in 3 Minutes was originally published on Drawism.com .

Report